
How to Organize and Pack Your Memories for Digitizing
You do not need to make your collection perfect before sending it to Memory Fortress.
Some customers send us boxes exactly as they have been stored for years. Others carefully organize everything by person, year, trip or event. Both are completely fine.
If you do choose to organize, a little work at home can help us return a digital collection that is easier for you and your family to understand later.
What Is Sitting on Your Kitchen Table?
Choose the type of memory you are preparing. We will take you directly to the instructions for that part of your collection.
Organize as Much - or as Little - as You Want
You do not have to organize your collection before sending it to us. Many customers send boxes exactly as they have been stored for years, and that is completely fine. Others organize everything down to individual family members, years, events or trips. In general, the more organization you give us, the more organized your finished digital collection can be.
If you create multiple custom groups, we can preserve those groups as separate digital folders.
How to Organize Loose Photos
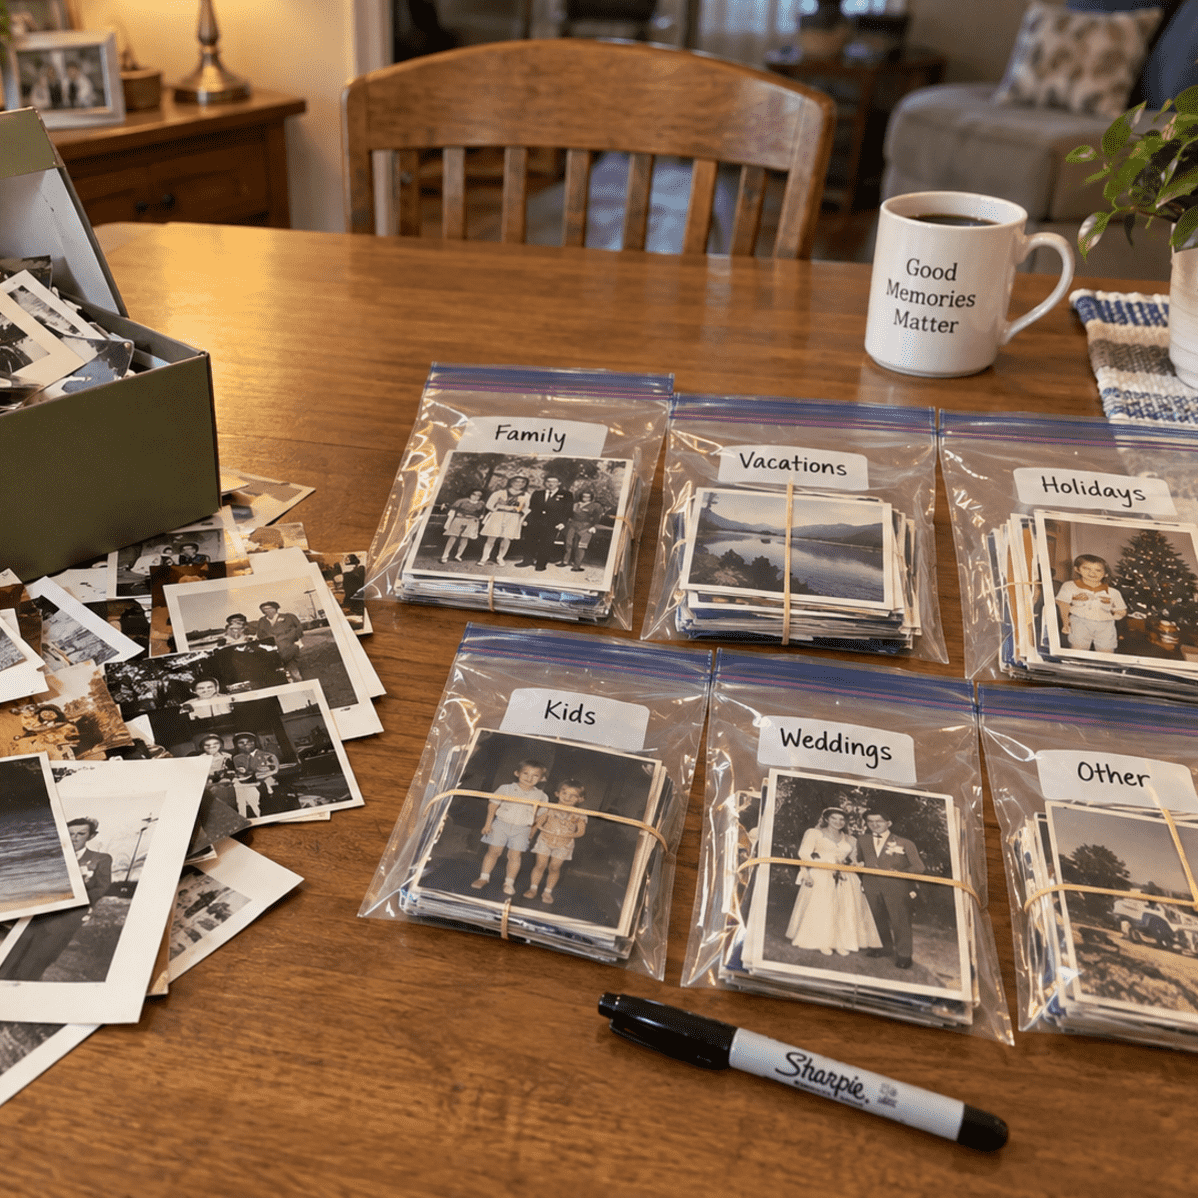
The Best Simple Method
For most loose-photo collections, the easiest system is to make a few meaningful groups and place each group into its own labeled freezer bag.
- Use freezer bags for major groups such as “Mom’s Childhood,” “Beach Vacations,” “Christmas Photos” or “Grandma’s Family.”
- Label each bag clearly with a Sharpie, or place a paper note inside the bag with the same name.
- Keep similar photos together instead of mixing everything into one large stack.
- Loose rubber bands can help with smaller groups, especially when several small groups need to remain separate inside one larger bag. Do not wrap them tightly around fragile photographs.
- You do not need exact counts. Estimates are perfectly fine.
And if your goal is simply “scan everything,” that is fine too. We can absolutely work from unsorted loose photos. Organization helps, but it is never mandatory.
What Helps the Most
The more clearly your loose photos are grouped, the easier it is for us to preserve the organization you want in the finished digital collection.
- Group photos by family member, time period, event, vacation or whatever categories make sense to you.
- If photographs already came from a particular envelope, drawer, album or family box, consider keeping that group together.
- If a group matters, say so in writing. A note such as “Keep these together in one folder” removes any guesswork.
- If a smaller subgroup belongs inside a larger group, place it in a smaller bag or bundle and label it separately.
- If you have photographs that do not fit anywhere, a perfectly good category is simply “Unsorted” or “Miscellaneous.”
Think of it this way: if you want your digital files to reflect the story that already makes sense in your head, leave us enough clues to follow that story.
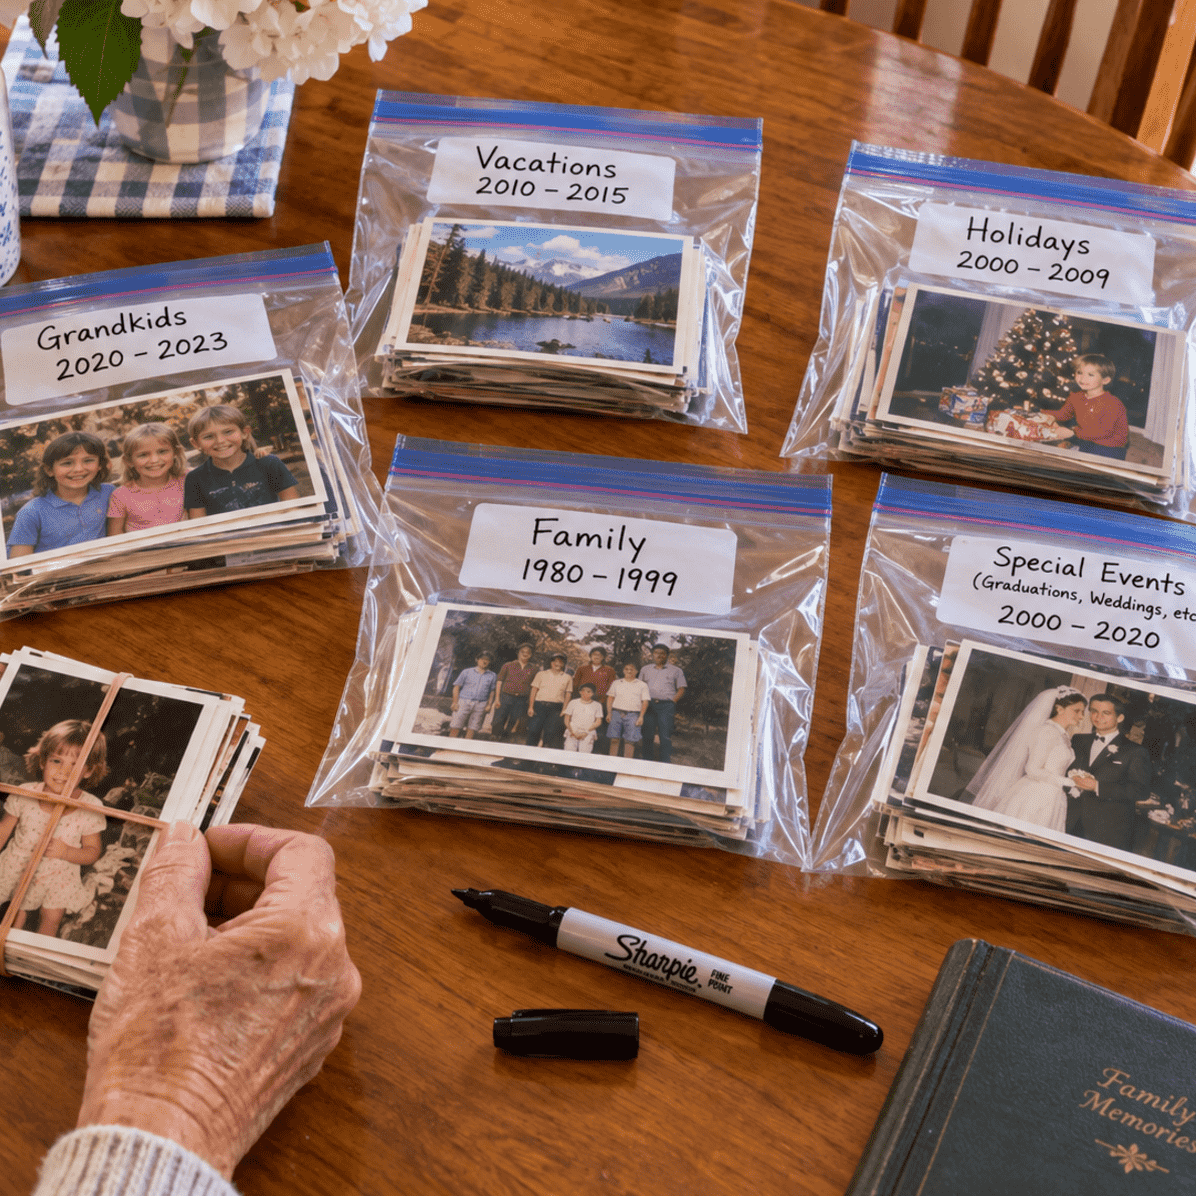
Example: Organizing 1,200 Family Photos
Imagine you have about 1,200 loose prints spread across three old boxes, several envelopes and a kitchen drawer. You do not want to identify every photograph or put the entire collection into chronological order. You simply want the finished digital files to make sense.
A perfectly reasonable setup might look like this:
Inside each freezer bag, place a simple slip of paper with the group name. Write the same name on the outside of the bag with a Sharpie.
Suppose the “Vacations” bag contains one stack from Disney World in 1994 that you especially want kept together. Put that smaller stack in its own smaller bag, or loosely bundle it with a rubber band and add a note reading “Disney 1994.”
That is enough. You have not created a museum archive or identified 1,200 individual photographs. You have simply given us a structure we can follow.
And if this sounds like more organization than you want to do, that is completely okay. Many customers do much less. The point of this example is to show a useful middle ground—not a requirement.
What To Do
- Use freezer bags for major groups
- Write clear labels with a Sharpie
- Keep meaningful groups together
- Add short notes when something is important
- Use smaller bags or loose bundles for subgroups
- Create an “Unsorted” group when you are finished sorting
What Not To Worry About
- You do not have to sort every photograph
- You do not need exact photo counts
- You do not need every year identified
- You do not need perfect chronological order
- You do not need to remove every duplicate
- You do not need to organize at all if it becomes overwhelming
How to Handle Photo Albums
If your pictures are still inside photo albums, you are not alone. Many families have shelves, boxes and closets full of albums they have not opened in years. In general, removing the photos before you send them is usually the simpler and lower-cost option — but if that feels overwhelming, we can absolutely handle the hard part for you.
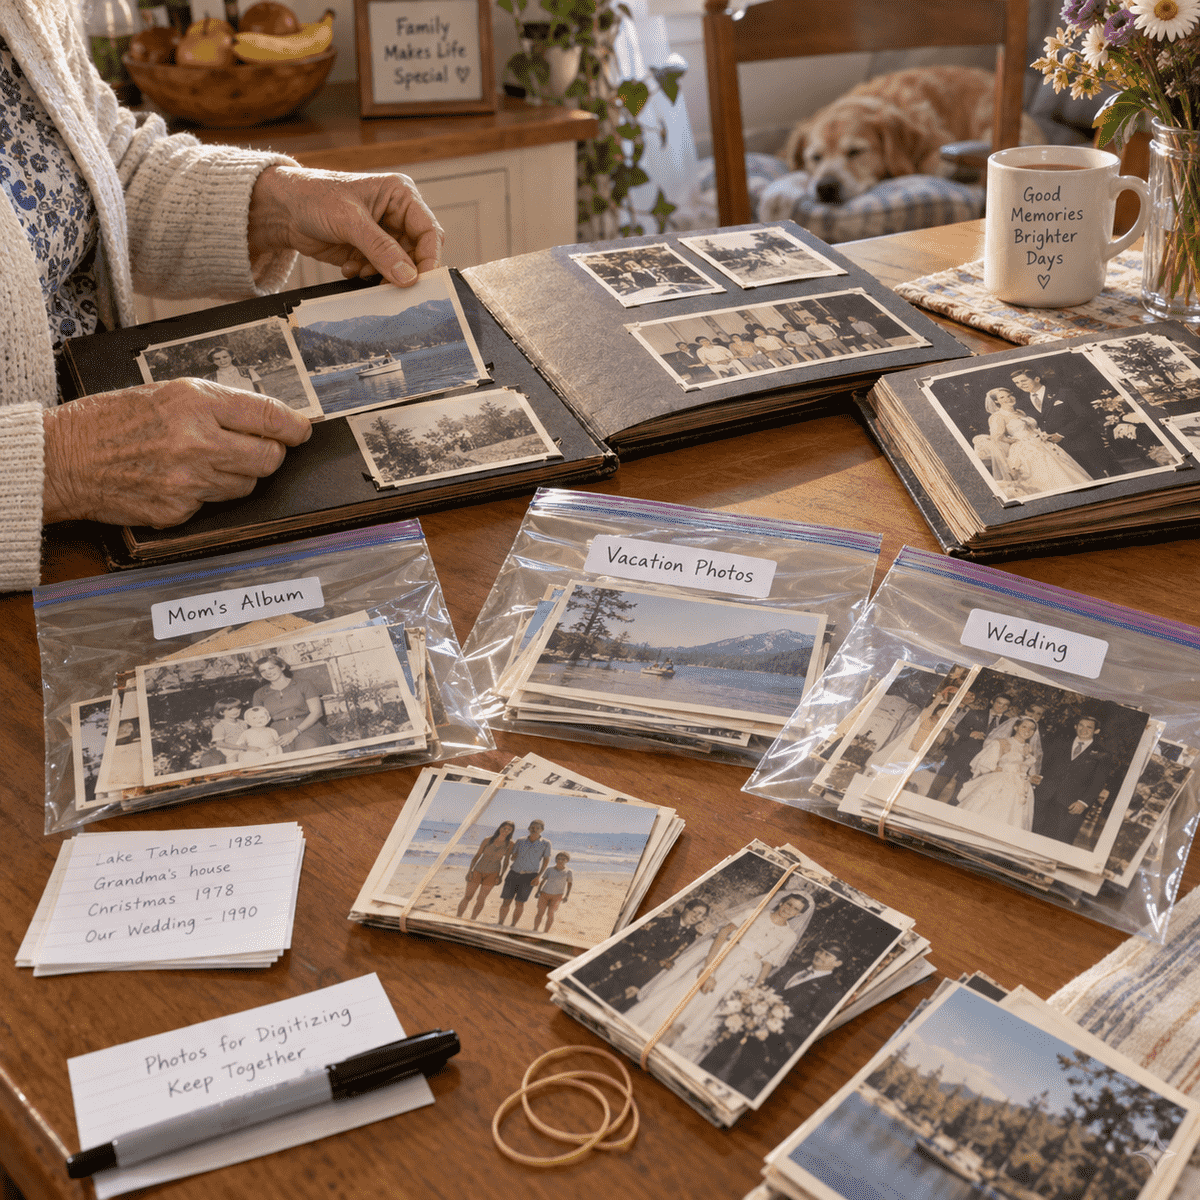
Remove the Photos at Home
If the photos come out reasonably easily, removing them before shipping usually makes the project faster, simpler and more affordable.
- Keep groups together as you remove them.
- Place each group into a labeled freezer bag or envelope.
- Write a short label such as “Smith Family Album,” “Beach Trips,” or “Grandma’s Wedding Photos.”
- If album order matters, note that clearly and keep the group in sequence.
You do not need museum-level organization. We just want enough structure to understand what belongs together.
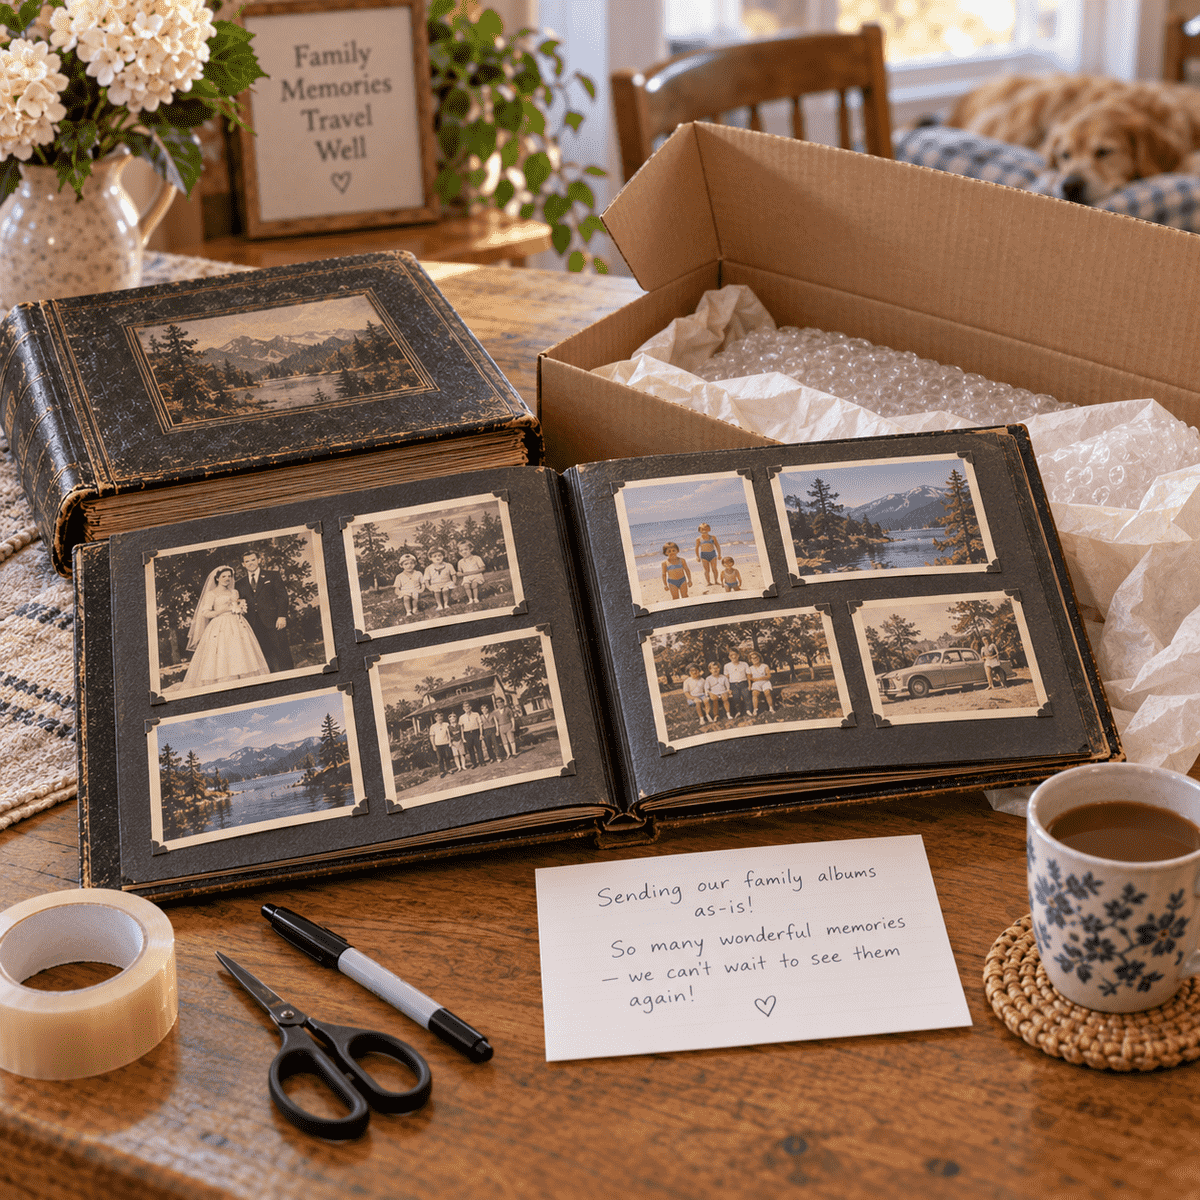
Send the Albums As They Are
Some albums are packed tightly, fragile, sticky, magnetic or simply too time-consuming to take apart. If you would rather leave the photos in place, send them in just like that.
- We can remove the photos for you if needed.
- You do not need to do the labor yourself just to get started.
- This option is especially helpful for very large album collections or customers who would rather have us handle the extra work.
- If an album is delicate or unusually important, leave a note so we handle it with extra care.
We do this type of work all the time, so please do not let a shelf full of albums stop you from moving forward.
What Happens If We Remove the Photos for You?
When we remove photos from albums here in-house, we generally do not place them back into the albums afterward. Instead, once the pictures have been scanned, we return the original photos in clearly grouped bags or bundles, along with the empty albums.
This usually gives you a practical end result: your digital copies are complete, your original photos are returned safely, and we return the empty albums separately rather than charging you for the additional labor of rebuilding them.
Helpful If You Remove Them Yourself
- Keep one album or one major group together at a time.
- If captions or notes matter, keep those pages or make a quick note.
- If several photos are stuck or delicate, stop and leave those for us.
- Do not worry about making everything perfect.
Helpful If You Send Albums Intact
- Leave the photos in place and pack the albums securely.
- Add a short note if certain albums are especially important.
- If you want certain albums kept separate, label them clearly.
- Expect that removing the photos for you is more labor-intensive than sending loose photos.
The main thing to know: removing the photos yourself is often the easier and less expensive route, but if that feels like too much work, Memory Fortress can handle it for you. Do not let a large album collection keep you from getting started.
Sometimes the Whole Page Is the Memory
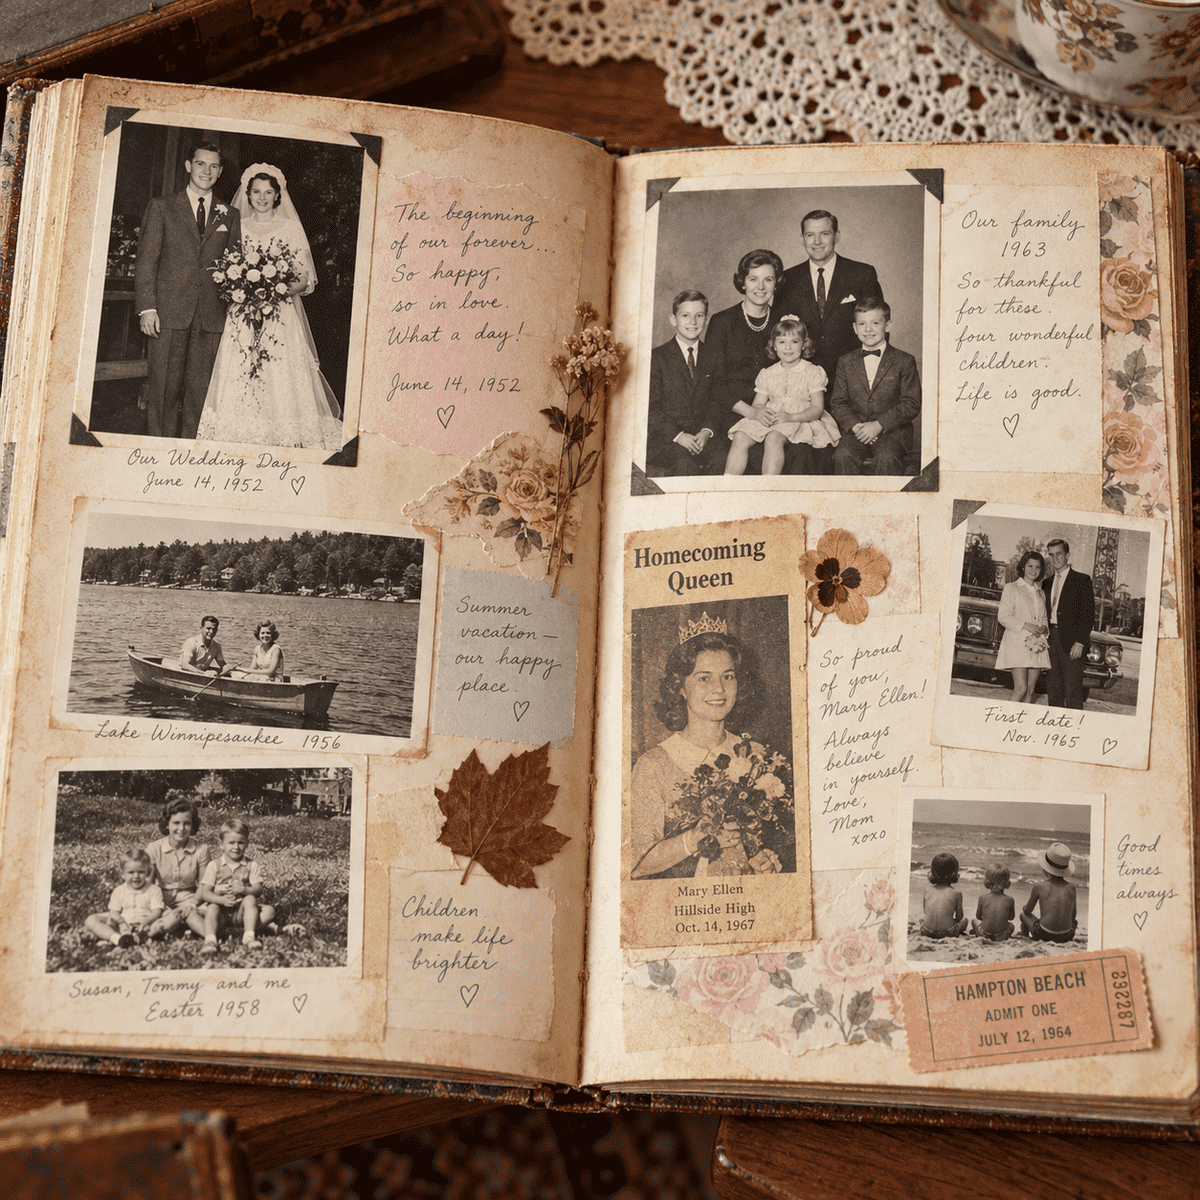
Send Older Scrapbooks as They Are
Many older scrapbooks contain photographs, handwritten notes and page designs that should stay together. If the pages are fragile, meaningful or too difficult to take apart, it is completely fine to send the scrapbook intact.
In many cases, keeping the scrapbook together is the best way to preserve the story as your family created it.
- Leave the photos, notes and page layout in place.
- Keep one scrapbook separate from the next.
- Place each scrapbook in its own clean kitchen trash bag or similar large protective bag.
- Label the bag clearly if the scrapbook has a meaningful title or time period.
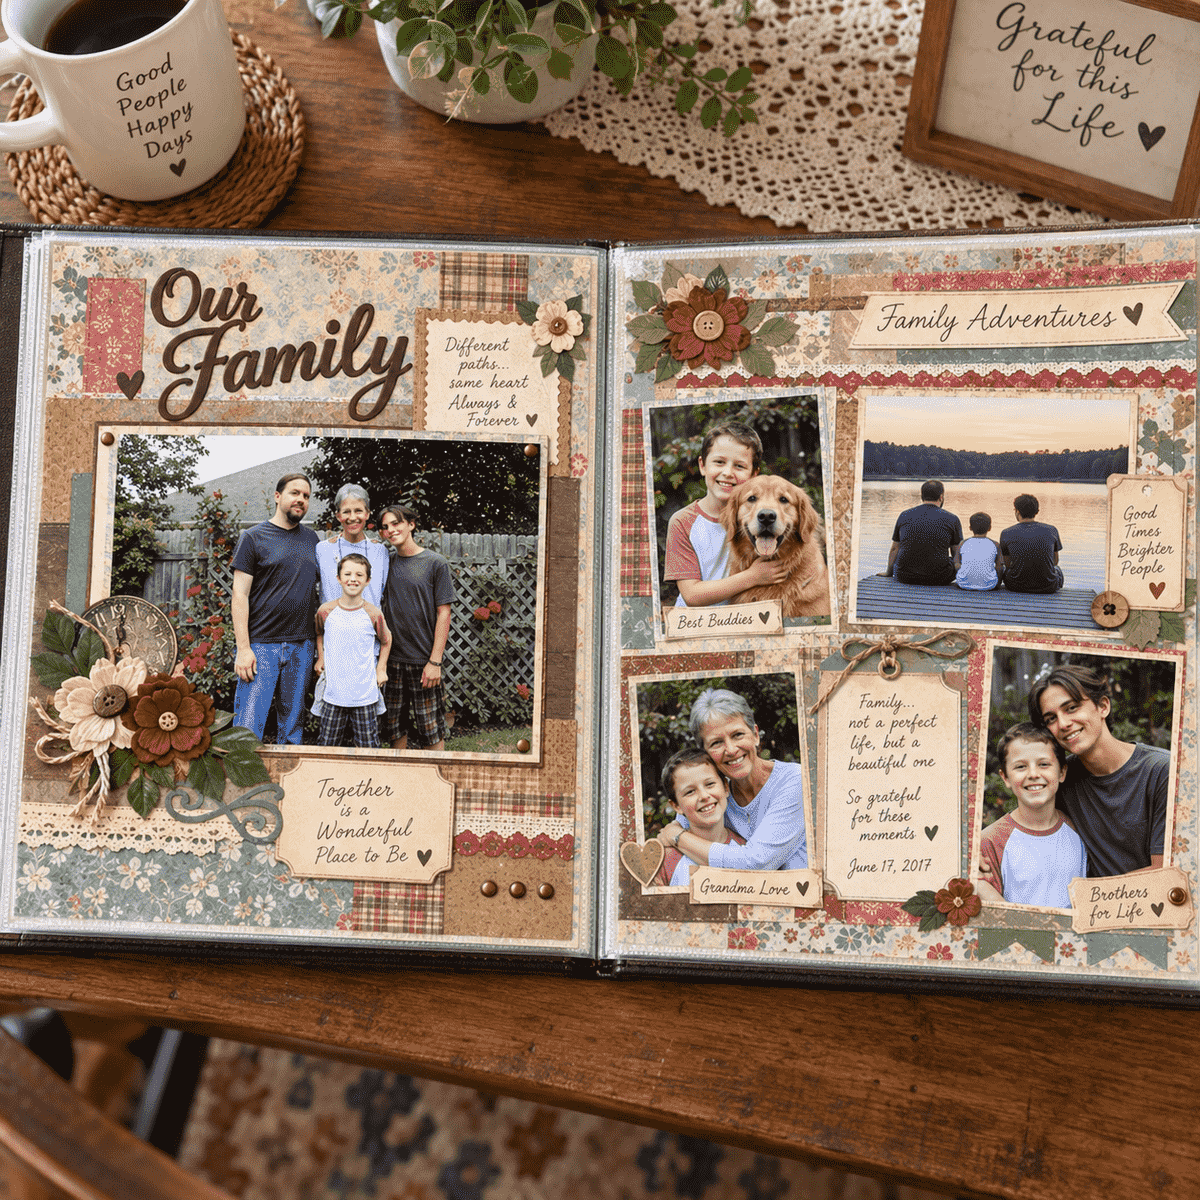
Please Remove the Plastic Page Protectors
Creative Memories albums and similar 12x12 scrapbooks are extremely common. If you have these albums, one of the most helpful things you can do is remove the clear plastic page protectors before sending them.
That simple step makes the pages easier to handle and scan, while still allowing the scrapbook pages themselves to stay organized as a complete group.
- Remove the clear plastic page protectors from the scrapbook pages if you are able.
- Keep the scrapbook pages in order.
- Place the scrapbook or page set into its own kitchen trash bag for separation and protection.
- If the album has a title such as “Baby Book,” “Disney 2004” or “Family Christmas,” label the outside of the bag.
Example: A Real-World Scrapbook Setup
Let’s say a customer has six scrapbooks at home:
- Scrapbook 1: “Our Wedding” — older album with photos and handwritten notes
- Scrapbook 2: “Baby Book” — Creative Memories 12x12 album
- Scrapbook 3: “Disney Trip 2004” — Creative Memories 12x12 album
- Scrapbook 4: “Kids School Years” — colorful scrapbook with captions and decorations
- Scrapbook 5: “Family Vacations” — older mixed scrapbook
- Scrapbook 6: “Christmas Memories” — album with photos, cards and notes
Here is a practical way to prepare them:
- Place each scrapbook in its own kitchen trash bag so every album stays separate and protected.
- Write a clear label on the outside of each bag with a Sharpie, such as “Wedding,” “Baby Book,” “Disney 2004,” “School Years,” “Vacations,” or “Christmas.”
- If the scrapbook is a Creative Memories album, remove the clear plastic page protectors first, then keep the album pages in order.
- If there are any loose notes, captions, ticket stubs or small keepsakes, keep them with that scrapbook in the same bag.
- If one scrapbook is especially important, place a simple note inside the bag saying something like “Please keep pages in this exact order.”
The goal is not perfection. The goal is to make it obvious where one scrapbook ends and the next one begins.
This kind of setup gives our team clear structure and usually leads to a smoother, more understandable digital result.
What Helps the Most
- One scrapbook per bag
- Clear outside labels
- Creative Memories plastic page protectors removed
- Pages kept in order
- Loose keepsakes kept with the correct scrapbook
- A short written note if something matters a lot
What Not to Worry About
- You do not need museum-level organization
- You do not need to rewrite every caption
- You do not need to disassemble fragile older scrapbooks
- You do not need to make everything identical
- You do not need to handle every difficult album yourself before getting started
How to Organize Negatives
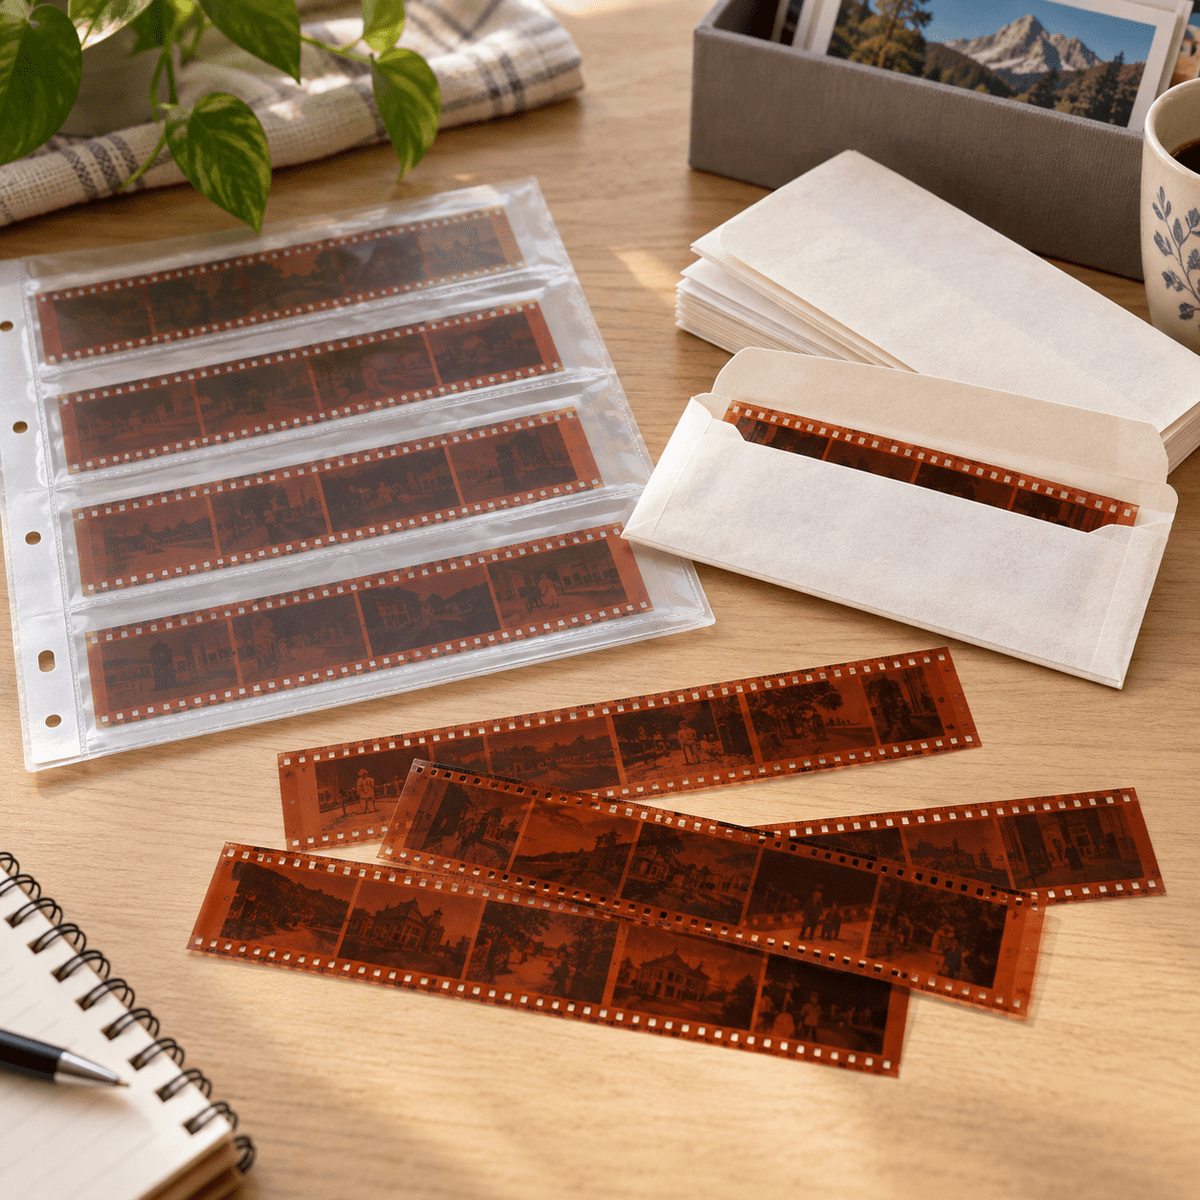
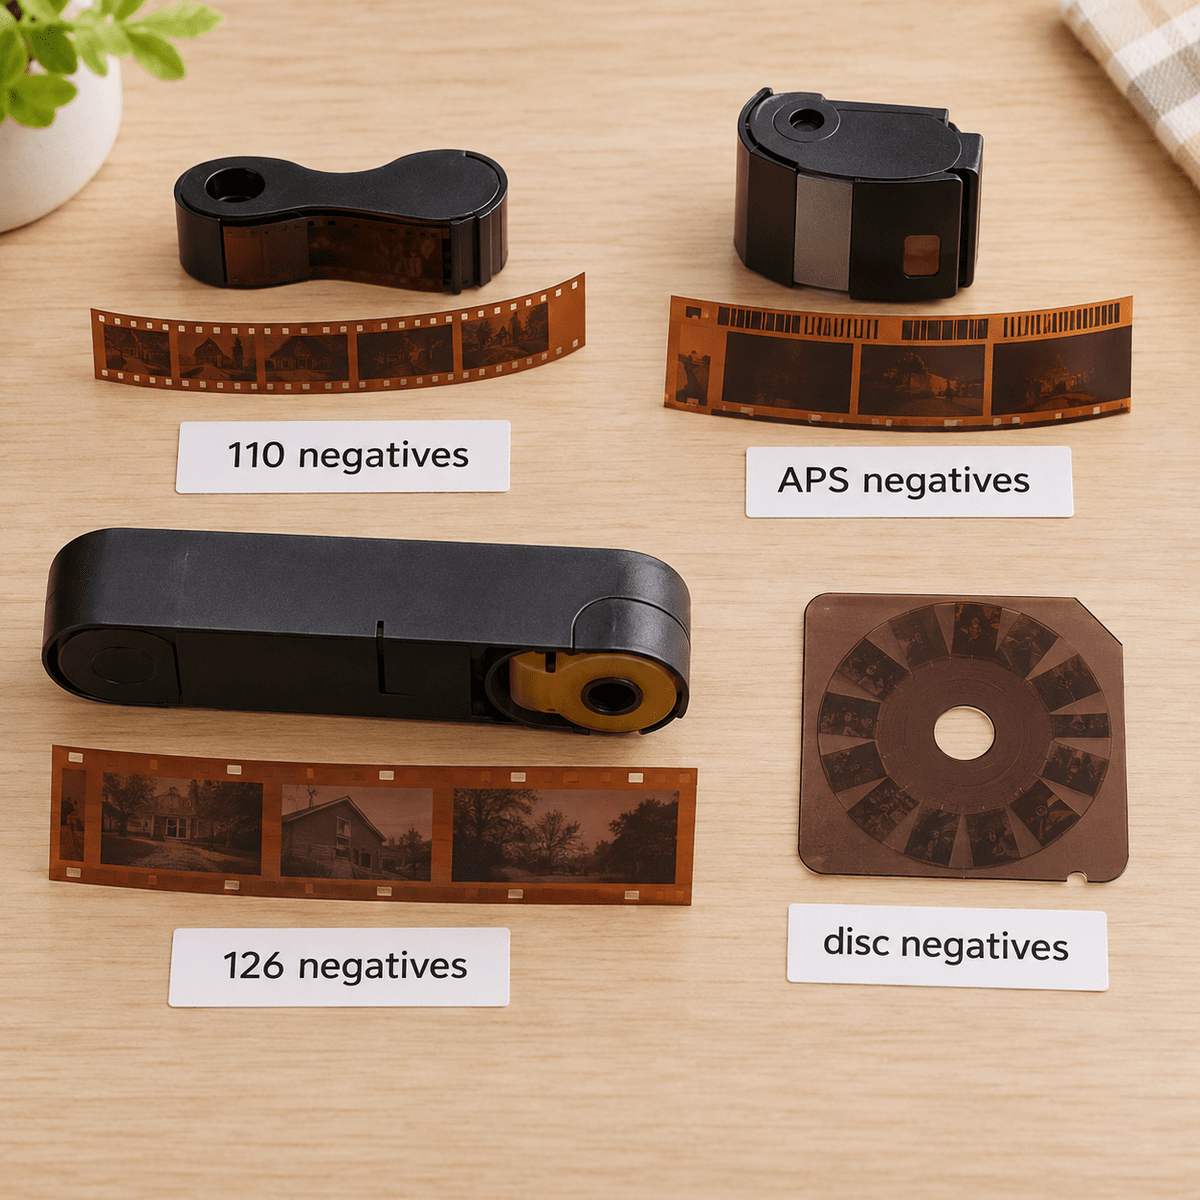
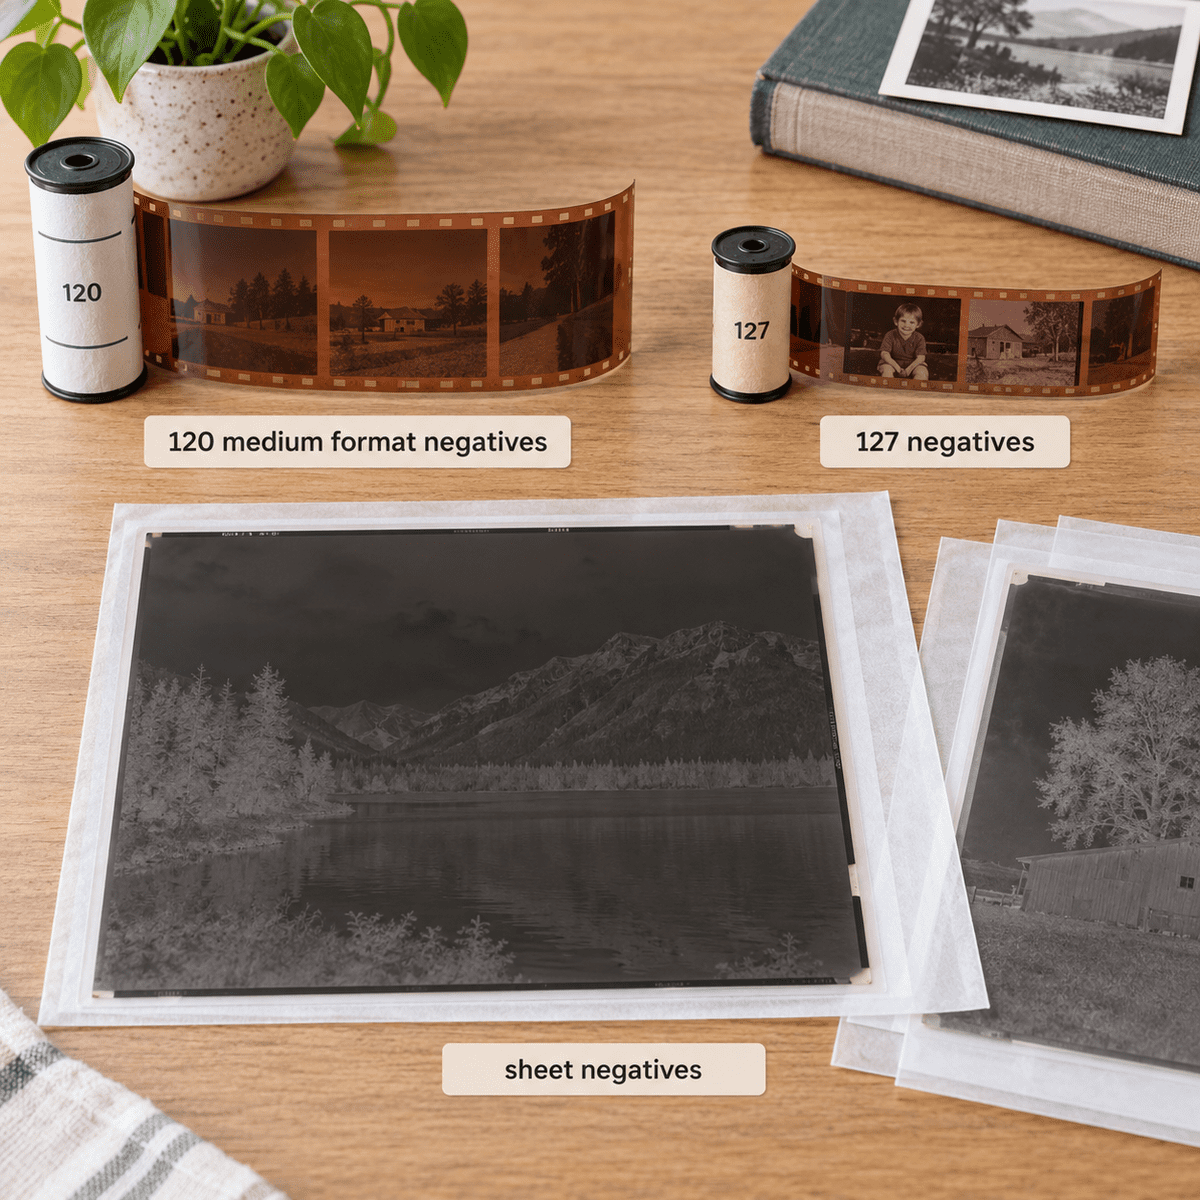
Negatives often arrive in envelopes, sleeves, boxes or mixed stacks. The most common type is 35mm, but many families also have older or less familiar formats. You do not need to identify every last strip perfectly — but a little grouping at home usually helps.
The Best Way to Prepare Negatives
If you can, begin by separating your negatives into broad format groups. Put the obvious 35mm negatives together, and keep any larger, smaller or unfamiliar negatives in their own separate groups.
Keep sleeves, envelopes and original notes
Old paper sleeves, lab envelopes and handwritten notes often tell us what a group is, when it was developed, or how it belongs with the rest of your collection.
Group by format first, then by family or event
Separate 35mm from other formats when you can. Inside each format, it is helpful to group by family member, decade, trip or major event.
Use bags or envelopes to keep groups together
If negatives are loose, place each group into a labeled freezer bag or envelope. If strips are already in sleeves, keep them there and bag the entire group together.
Leave unknown negatives separate
If you are unsure what a group is, that is completely fine. Just label it something simple like “Unknown Negatives” or “Need Help Identifying”.
Example: A Simple Real-World Setup
Let’s say a customer has several old film envelopes, one small box of loose negatives, and a few larger-format strips from an older camera.
- Envelope 1: “Smith Family 1984–1987” — 35mm negatives
- Envelope 2: “Beach Vacation” — 35mm negatives
- Bag 1: loose 35mm strips found in a drawer
- Bag 2: larger negatives from an older camera
- Bag 3: “Unknown Negatives” for anything unclear
That level of organization is more than enough. We do not need perfection — just enough structure to preserve what belongs together.
What Not to Worry About
- You do not need every year identified.
- You do not need exact frame counts.
- You do not need every strip in perfect order.
- You do not need to know every negative format by name.
- You do not need to force a complicated sorting system if that feels overwhelming.
The goal is simply to prevent different groups from getting mixed together and to give us clues about what matters most.
Organizing Videotapes Is Easier Than It Looks
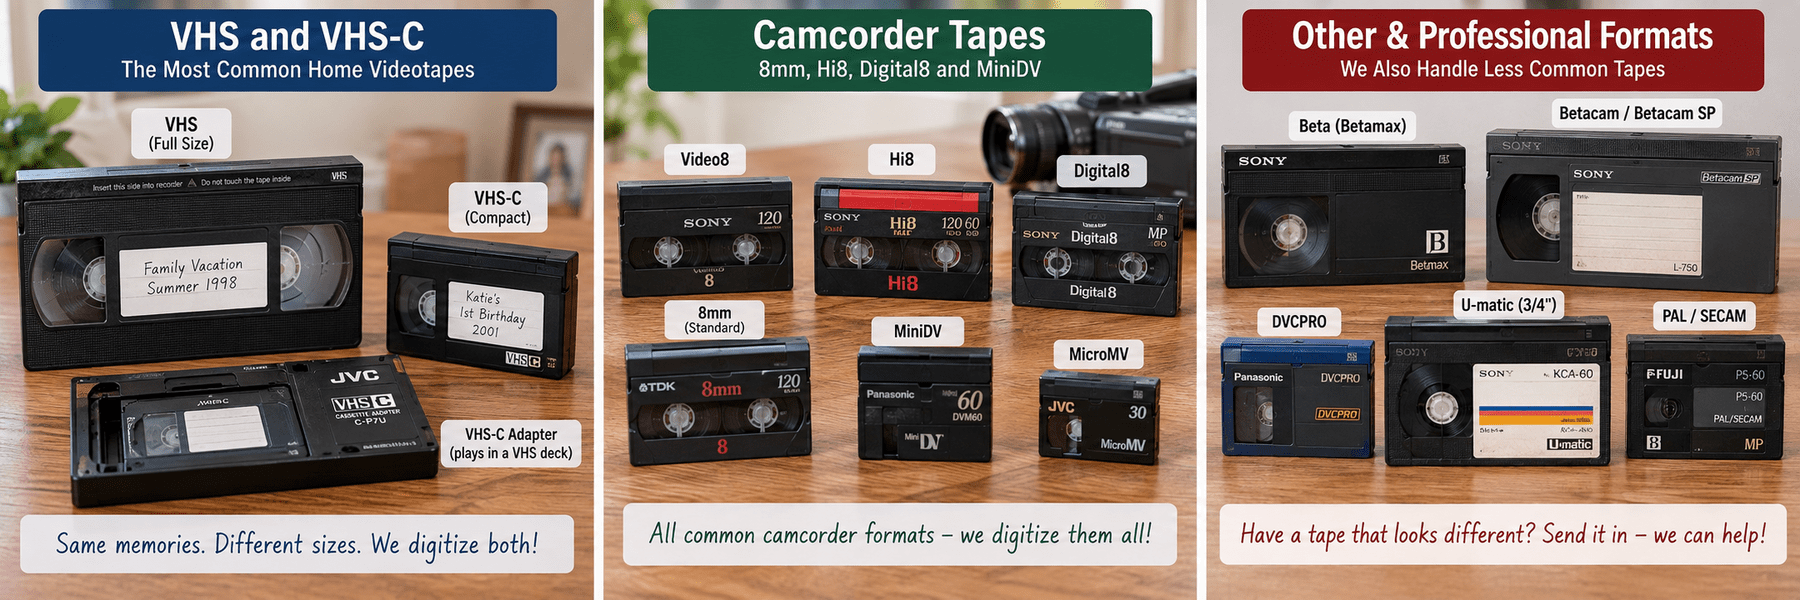
VHS may be the format everyone recognizes, but family video collections often contain several different kinds of tapes. You do not need to identify every format before sending your project. What helps us most is knowing which tapes belong together and whether a particular order matters to you.
If you know what is on a tape, label it. If you do not know, send it anyway.
Four Things We Need From You
Nothing complicated. These four things make almost any videotape collection manageable.
Leave Existing Labels Alone
“Christmas 1996,” “Jennifer Soccer,” “Grandma,” “Tape 7” and even barely readable handwriting can provide useful clues. Keep the tape with its original case when the case contains additional information.
Make Broad Groups
If 12 tapes came from Dad's camcorder, keep those together. If another box contains the kids' VHS tapes, that can be another group. A freezer bag, small box or other clearly labeled container works well.
Number the Tapes
Write 1 of 6, 2 of 6, 3 of 6 and so forth, or add a clearly visible numbered note. If order does not matter, there is no need to invent one.
Create a Mystery Group
Put the unidentified tapes together and label the group “Unknown,” “Mystery Tapes,” or something equally simple. You do not need to preview every tape to earn the right to digitize it.
Labels Do Not Have to Be Fancy
These are all perfectly useful ways customers organize videotapes. Your system only needs to make sense to you — and give our production team enough clues to follow it.
family project
Example: A Closet Full of Tapes From Three Different Camcorders
A customer opens an old cabinet and finds 43 videotapes collected over almost 25 years:
- 14 VHS tapes labeled with holidays and family events
- 8 VHS-C tapes from an older camcorder
- 12 8mm / Hi8 / Digital8 tapes that all came from Dad's camcorder bag
- 5 MiniDV tapes from the early 2000s
- 4 completely unlabeled tapes
There is no need to watch 43 tapes before getting started.
Put the VHS holiday tapes together. Keep the VHS-C tapes together. Label Dad's camcorder group as one group even if you are unsure which flavor of 8mm each cassette happens to be. Keep the MiniDV tapes together. Then put the four unlabeled tapes into a bag marked “Mystery Tapes.”
That is enough. You have turned a closet full of confusing videotapes into five understandable groups without spending an entire weekend watching old footage.
Keep the Reels Together — We Will Figure Out the Rest
Family movie film may arrive on tiny 3-inch reels, larger 5-inch or 7-inch reels, or substantial 16mm reels. Some film has sound. Some does not. Some boxes are carefully labeled, while others have not been opened in fifty years. You do not have to identify everything before sending it.
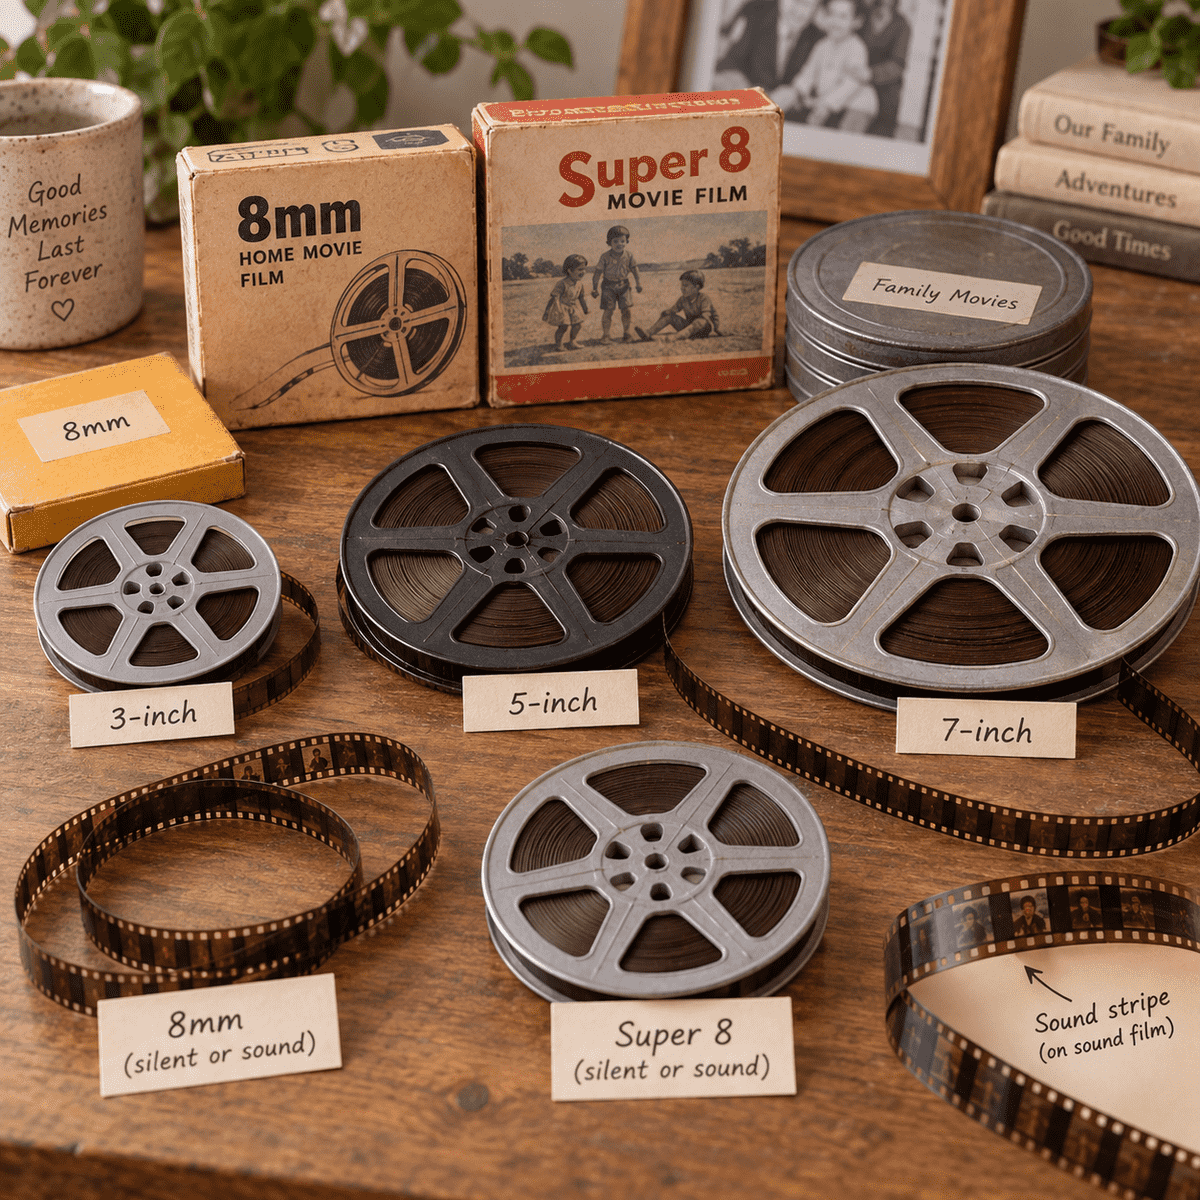
Small Reels Are Extremely Common
The classic home-movie collection often consists of 8mm or Super 8 film stored on several different reel sizes. You may have dozens of small reels, several larger reels, or a mixture of both.
- Leave film on its existing reel.
- Keep original reel boxes whenever they contain useful labels.
- If several reels belong together, keep them in one labeled group.
- If sequence matters, number the reels clearly.
- Do not unwind the film just to inspect it.
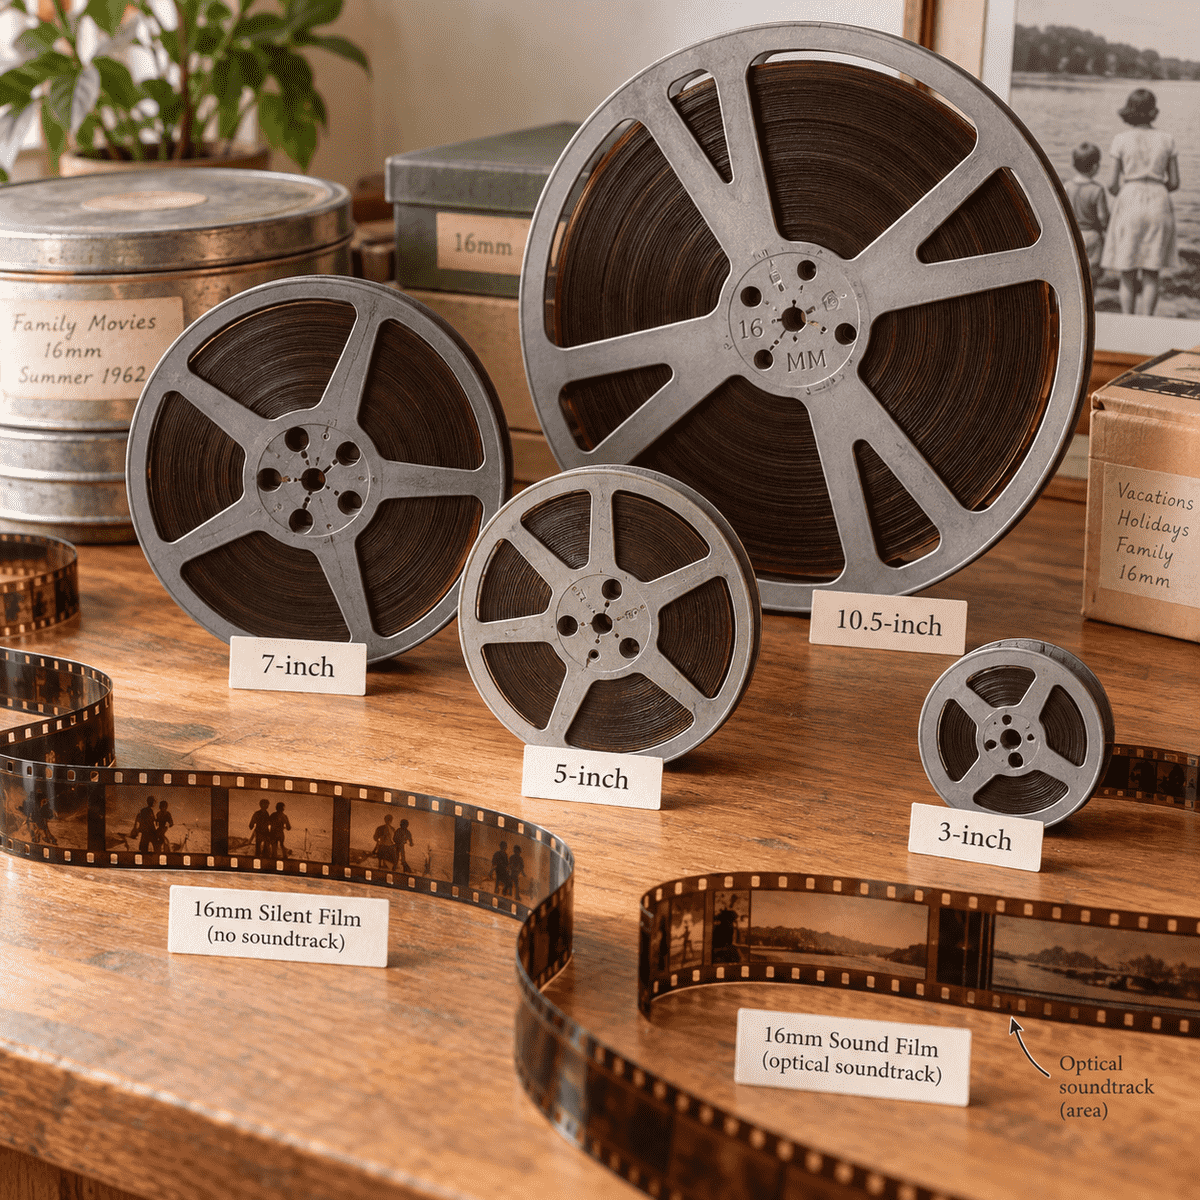
16mm Is Welcome Too
Larger 16mm reels are also part of many family collections, especially older home movies, school films, church films, military footage and professionally filmed family events.
- Keep each reel in its original can or box when possible.
- Preserve handwritten labels, dates and location information.
- Keep related reels together if they form one longer event or story.
- Do not worry about determining whether the reel contains sound.
You Do Not Need to Figure Out Whether Your Film Has Audio
Both 8mm-family film and 16mm film can exist with or without sound. You do not need to inspect the film edge, identify a soundtrack, or know which type you have before sending it. If sound is present on your film, we will identify it during production and make sure it is converted properly with the picture.
Five Simple Rules for Preparing Movie Film
Movie film preparation is mostly about preserving what is already there rather than reorganizing everything.
Leave It on the Reel
There is normally no reason to remove or unwind film before sending it.
Keep the Box
Old reel boxes and cans often contain valuable names, dates and locations.
Group Related Reels
Vacations, holidays, family branches or other obvious groups can stay together.
Number the Order
If one reel should follow another, number the boxes or reels clearly.
Unknown Is Fine
A box labeled “Unknown Film” is much better than delaying the project for months.
family collection
Example: Grandpa's Home Movies Have Been in a Closet Since 1974
A family opens an old storage box and finds:
- 12 small 3-inch reels with almost no labels
- 7 five-inch reels marked with vacations and holidays
- 4 seven-inch reels labeled “Family Movies”
- 3 larger 16mm reels in metal cans
- 1 reel that says “Wedding — Sound”
There is no need to identify every reel, determine whether each one is 8mm or Super 8, or inspect the film for sound.
Keep the labeled reels with their original boxes or cans. Number any reels that clearly belong in sequence. Put the twelve unlabeled small reels together in a container marked “Unknown Small Reels.”
That is enough. When the collection reaches Memory Fortress, we can determine the film format, identify whether sound is present, and handle the conversion correctly.
Organize the Story — Not the Technology
Old recordings may contain a grandparent's voice, family interviews, children's first words, music, speeches or recordings no one has heard in decades. You do not need to know the technical details of every recording. What matters most is preserving whatever labels and family context you already have.
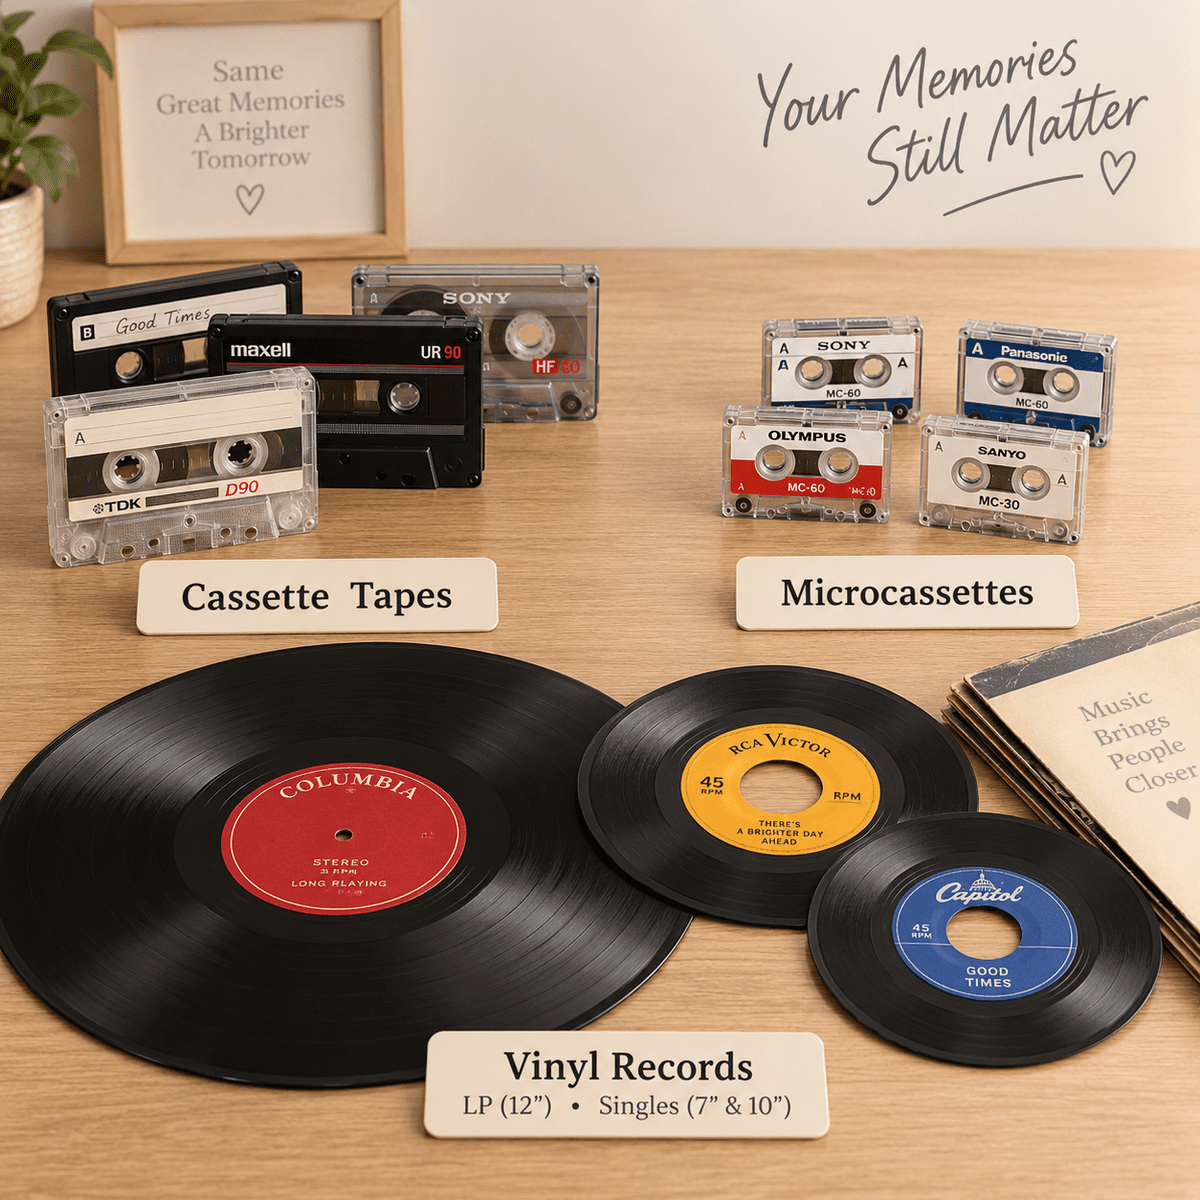
Start With Whatever the Recording Already Tells You
Audio collections often come with more useful information than customers realize. A cassette case, handwritten label, reel box or record sleeve may already contain everything needed to understand the recording.
Keep Cases and Sleeves
Keep cassettes with their original cases and records with their sleeves whenever those contain names, dates or other useful information.
Preserve Handwritten Labels
“Interview with Grandma,” “Christmas 1982,” “Dad Singing,” or even “Tape 4” may be extremely helpful later.
Keep Related Recordings Together
Several tapes from one interview, family member, event or time period can be grouped together.
Unknown Is Perfectly Fine
If you have no idea what is on a cassette or microcassette, you do not need to listen to the entire recording before sending it.
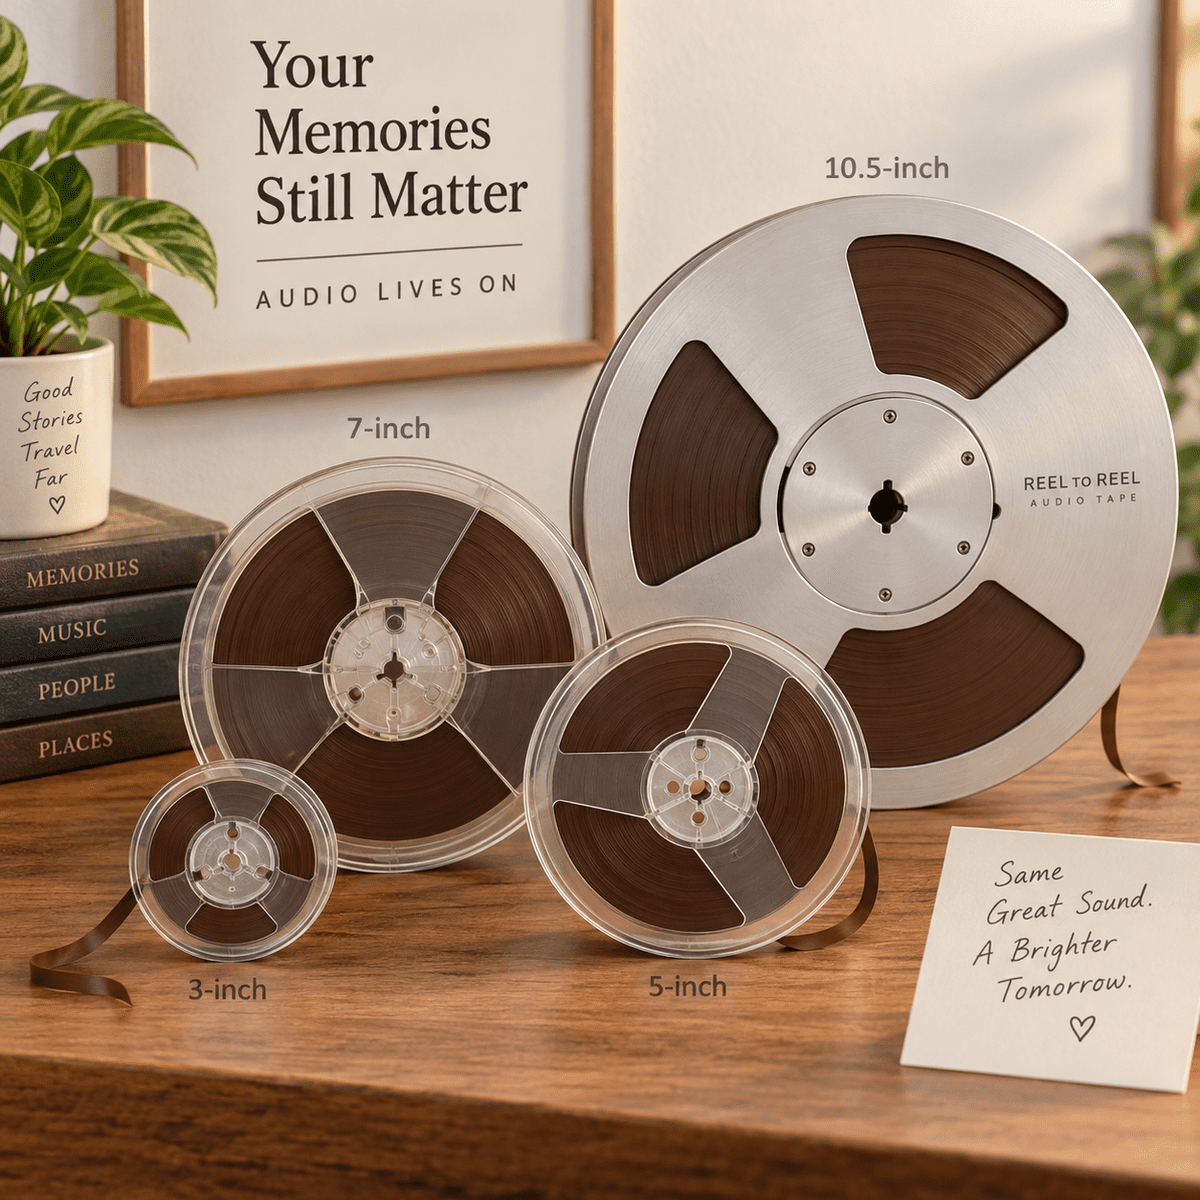
Brown Magnetic Tape on Reels? Send It Just Like That.
Open-reel audio recordings commonly arrive on several reel sizes, and the brown magnetic tape itself may be decades old. You do not need to unwind the reel, determine the recording speed, or figure out the technical setup.
- Leave the brown audio tape on its existing reel.
- Keep each reel with its original box whenever possible.
- Preserve handwritten labels and recording notes.
- If several reels belong in sequence, number them clearly.
- Do not play fragile old tape repeatedly just to identify it.
Useful Labels Can Be Surprisingly Simple
Do not feel obligated to create an elaborate catalog. These are examples of labels that give us plenty of useful information.
Example: A Box of Recordings From Mom and Dad's House
What the Family Finds
- 11 standard cassettes with mixed handwriting
- 6 microcassettes from an old handheld recorder
- 4 reel-to-reel tapes in boxes marked with family names
- 7 vinyl records they want preserved digitally
- 3 unlabeled cassettes nobody remembers recording
What They Actually Need to Do
Keep the eleven cassettes with their cases. Put the six microcassettes together in one labeled bag. Leave the brown reel-to-reel tape on the reels and keep those reels with their original boxes.
Keep the records with their sleeves. Then place the three mystery cassettes together and write “Unknown Audio.”
That is enough organization. There is no reason to listen to hours of old recordings before getting the project started.
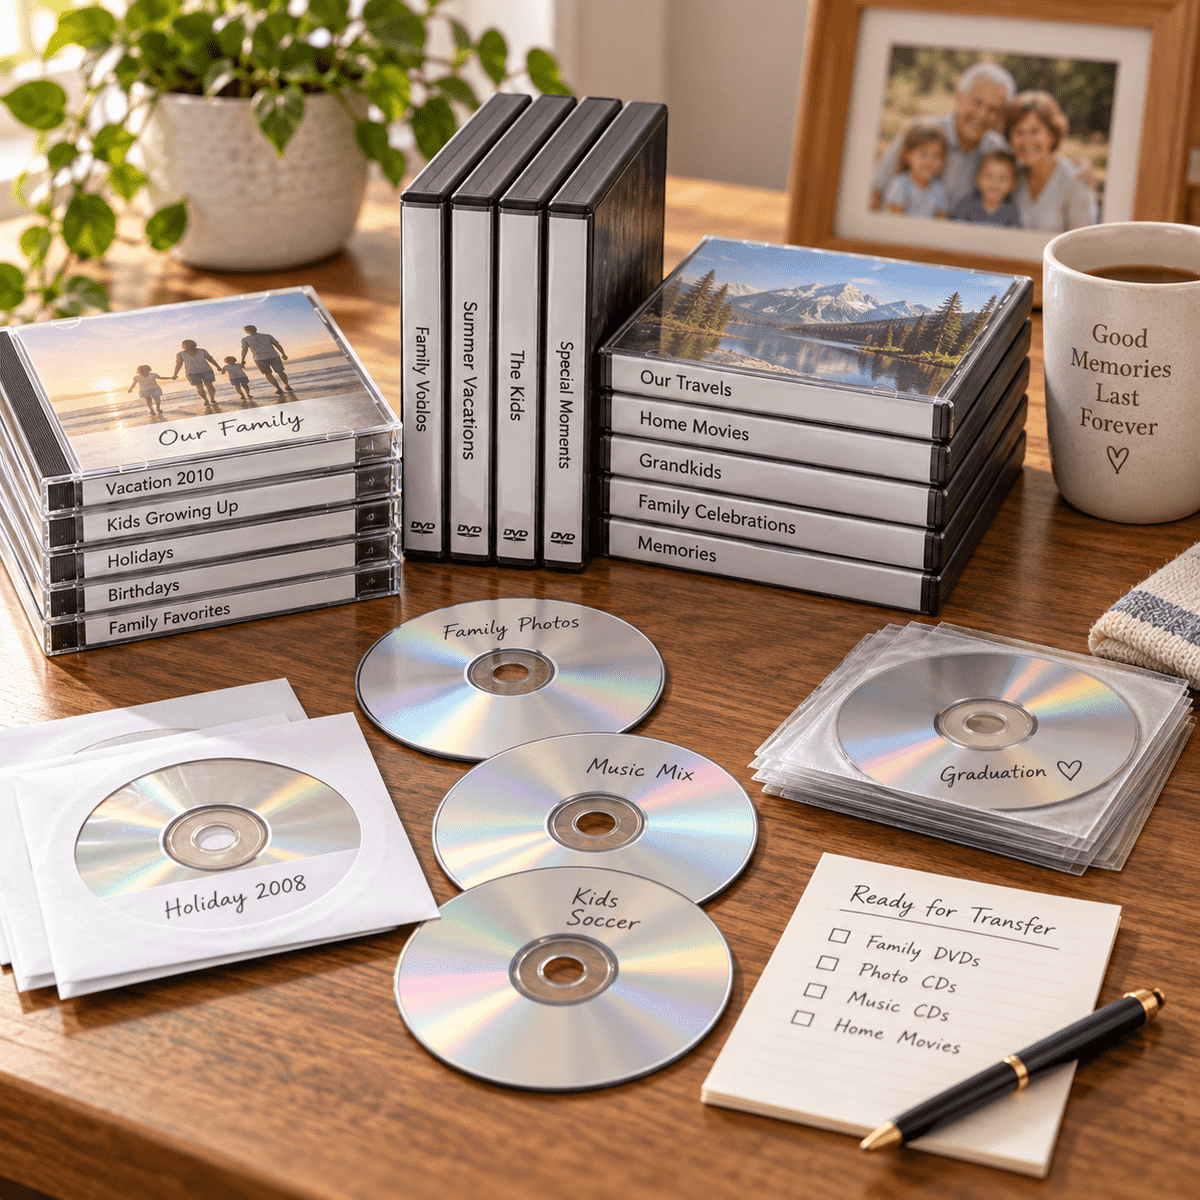
One Disc Can Hold Almost Anything
CDs and DVDs can contain much more than music or movies. Depending on how the disc was created, it may contain family photos, home videos, audio recordings, documents, scanned images or a mixture of several different file types.
That means you do not need to decide in advance whether a disc is a “photo disc” or a “video disc.” If the content is readable and eligible for transfer, we can move the files to modern storage for you.
And if the disc is unlabeled or you simply do not remember what is on it, that is completely normal.
What Might Be on Your Discs?
A single CD or DVD may contain one type of media — or several. The format of the disc does not always tell you what is stored on it.
Keep the Clues You Already Have
There is no need to sit at a computer and open every disc before sending the collection. Existing labels, cases and broad groups are usually enough.
- Keep discs with their original cases or sleeves when those contain useful information.
- Leave handwritten labels in place, even when they are vague.
- Group related discs together by family member, event, year or project if that is already obvious.
- If sequence matters, number the discs clearly.
- Put completely unlabeled discs together and call them “Mystery Discs” or “Unknown.”
- Do not worry about identifying whether each disc contains photos, video, audio or files before sending it.
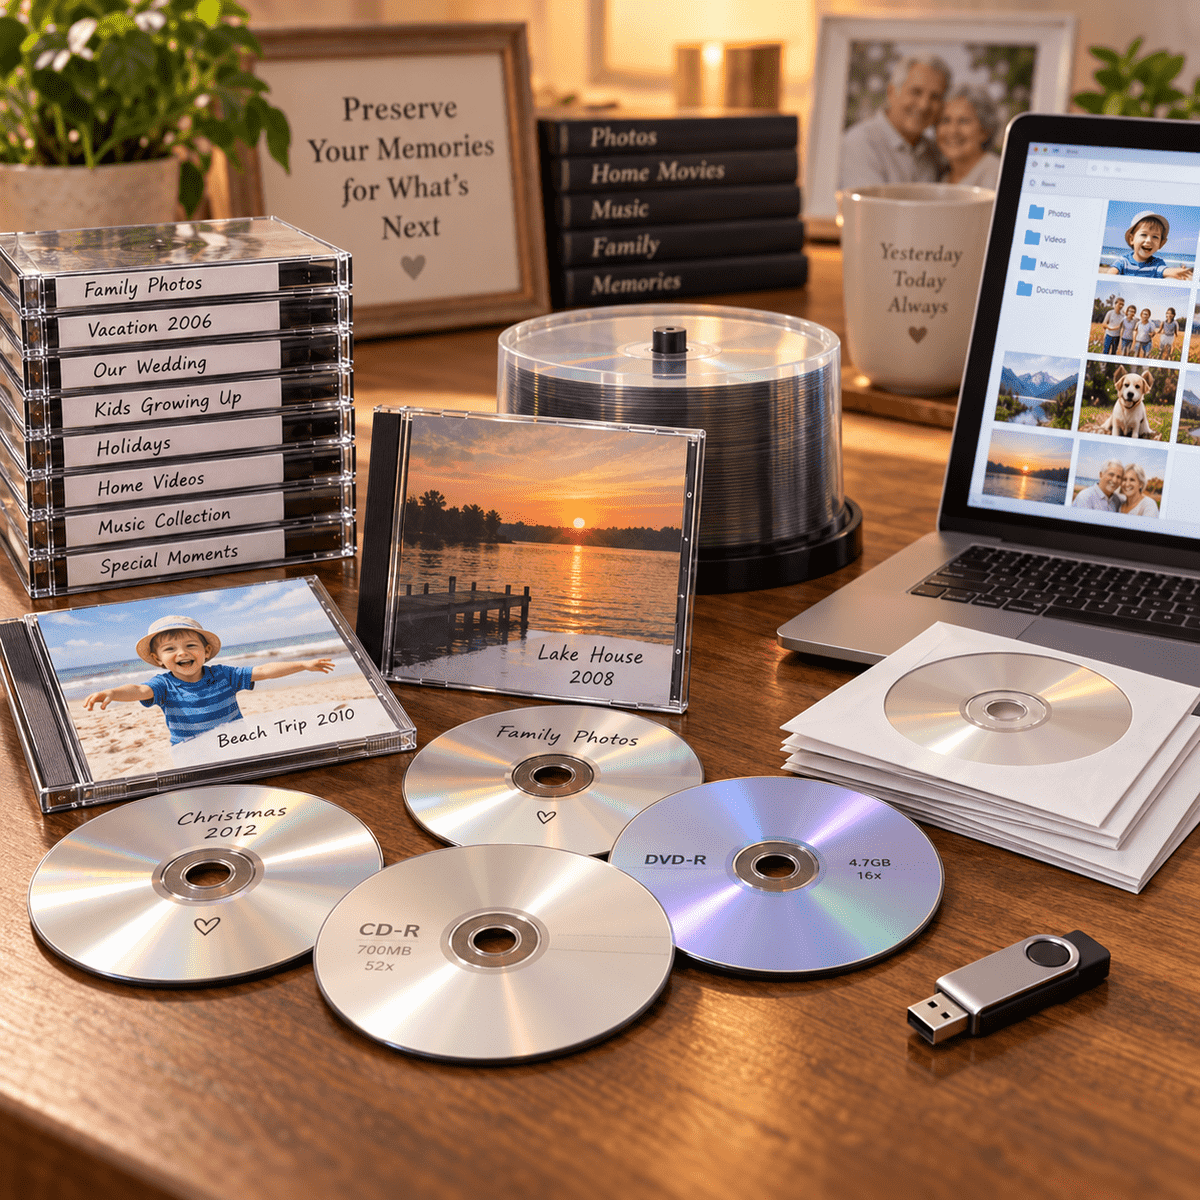
Where Should the Files Go?
Once the accessible contents are transferred, you can choose the modern destination that makes the most sense for you.
USB Flash Drive
A simple physical drive that can hold transferred photos, videos, audio and other files together.
Cloud Download
Receive your files through a digital download link so they can be saved to your computer and shared with family.
Another Preferred Destination
If you have another practical storage preference for the transferred files, let us know when the project is set up.
in one family desk
Example: Nobody Knows What Is on Half the Discs
A family finds 31 CDs and DVDs in an old desk drawer:
- 6 discs labeled “Family Photos”
- 5 discs labeled with vacations and years
- 4 DVDs marked “Home Movies”
- 3 discs labeled “Grandma's Scans”
- 13 discs with little or no useful labeling
They do not need to open all 31 discs before sending them.
Keep the obvious groups together. Put the thirteen unknown discs into one labeled group called “Mystery Discs.” If those discs contain readable family photos, video, audio or other files, we can transfer the accessible content into modern storage.
The family can then choose to receive the transferred material on a USB flash drive, through a cloud download link, or through another agreed-upon destination.
One Box Can Contain a Little Bit of Everything
Many customers do not have one neat collection of one media type. A single project may include photographs, albums, videotapes, slides, film reels, audio recordings, CDs, DVDs and items you may not even recognize.
- It is fine to send different types of media together in the same order.
- Keep obvious categories together so photos, tapes, slides, film and other items do not become unnecessarily mixed.
- If several different media types belong to the same family member, event or project, label that relationship clearly.
- You do not need to create a complicated inventory before sending the collection.
- Do not worry if you cannot identify every tape, reel, disc or photographic format.
- Keep unusual items protected and include them with the rest of the project.
- If you have a question about an item before shipping, send us a photo or call us.
- Do not discard something simply because you are unsure whether it can be digitized.
How to Pack Your Memories for Shipping
Once your collection is organized to the level you want, the goal is simply to keep those groups protected and intact while the box is in transit.
- Use a sturdy corrugated shipping box that comfortably fits the collection.
- Keep labeled groups in their own bags, envelopes, boxes or other containers so they do not become mixed together.
- Use packing material to fill empty space and prevent the contents from shifting inside the box.
- Protect fragile items from direct pressure, bending or movement during shipping.
- Make sure the box closes securely without forcing or crushing the contents.
- Include your name and contact information inside the package.
- Include any special notes or organization instructions that are important to your project.
- If you have an order form or other paperwork for the project, include it inside the box.
- Use a shipping service that provides tracking and keep the tracking number until your package has arrived.
- Before sealing the box, take one last look to make sure all intended items are included.
Put Your Contact Information Inside
Shipping labels can be damaged or separated from a package. A simple sheet of paper inside the box gives us another way to identify your order immediately.
- Your full name
- Your phone number
- Your email address
- Your order paperwork, if you have already completed an order form
- Any important notes about organization, folder names, sequencing or special handling
Ship Your Order to Memory Fortress
Once your collection is organized and packed, you can ship it directly to our Atlanta location. Most Memory Fortress customers send their materials to us from outside the Atlanta area.
Suite 128
Atlanta, GA 30329